How to install coolify on raspberry pi

This guide covers how to install coolify on raspberry pi in practical, step-by-step detail.
Whether you are setting up a homelab or learning server administration, this guide is written for developers and homelab enthusiasts. We cover prerequisites, detailed steps, verification, troubleshooting, and frequently asked questions so you can complete the project confidently.
What you will learn: how to plan, install, configure, and verify how to install coolify on raspberry pi from start to finish.
Prerequisites
Before you begin, make sure you have the following ready:
- Snapshot or back up the SD card before major system changes.
- Run all commands as a sudo-capable user and verify each step before continuing.
- Document hostname, IP address, and admin credentials securely.
- Test the panel on a non-production device first when using ARM hardware.
Background & Research
Before installing any control panel on ARM hardware, it is important to understand what you are getting into. how to install coolify on raspberry pi requires a stable Linux environment, adequate RAM, and open network ports for web traffic and the panel interface. Many tutorials skip the research phase and jump straight into commands — this guide explains why each step matters so you can troubleshoot independently.
This guide covers how to install coolify on raspberry pi in practical, step-by-step detail.
Always verify software compatibility with your hardware architecture (ARM64 vs x86).
Keeping your operating system updated before installation prevents dependency conflicts.
Raspberry Pi 4 or 5 with 4 GB+ RAM is recommended for running web control panels.
Raspberry Pi OS Lite (64-bit) is preferred for headless server workloads.
Use a high-quality power supply and fast SD card or USB SSD for stable performance.
Key Terms
- Control Panel
- A web-based interface to manage websites, DNS, email, and server services.
- Headless Server
- A server without a desktop GUI, managed remotely via SSH or a web panel.
Step-by-Step Tutorial
Follow these 7 steps in order to complete how to install coolify on raspberry pi.
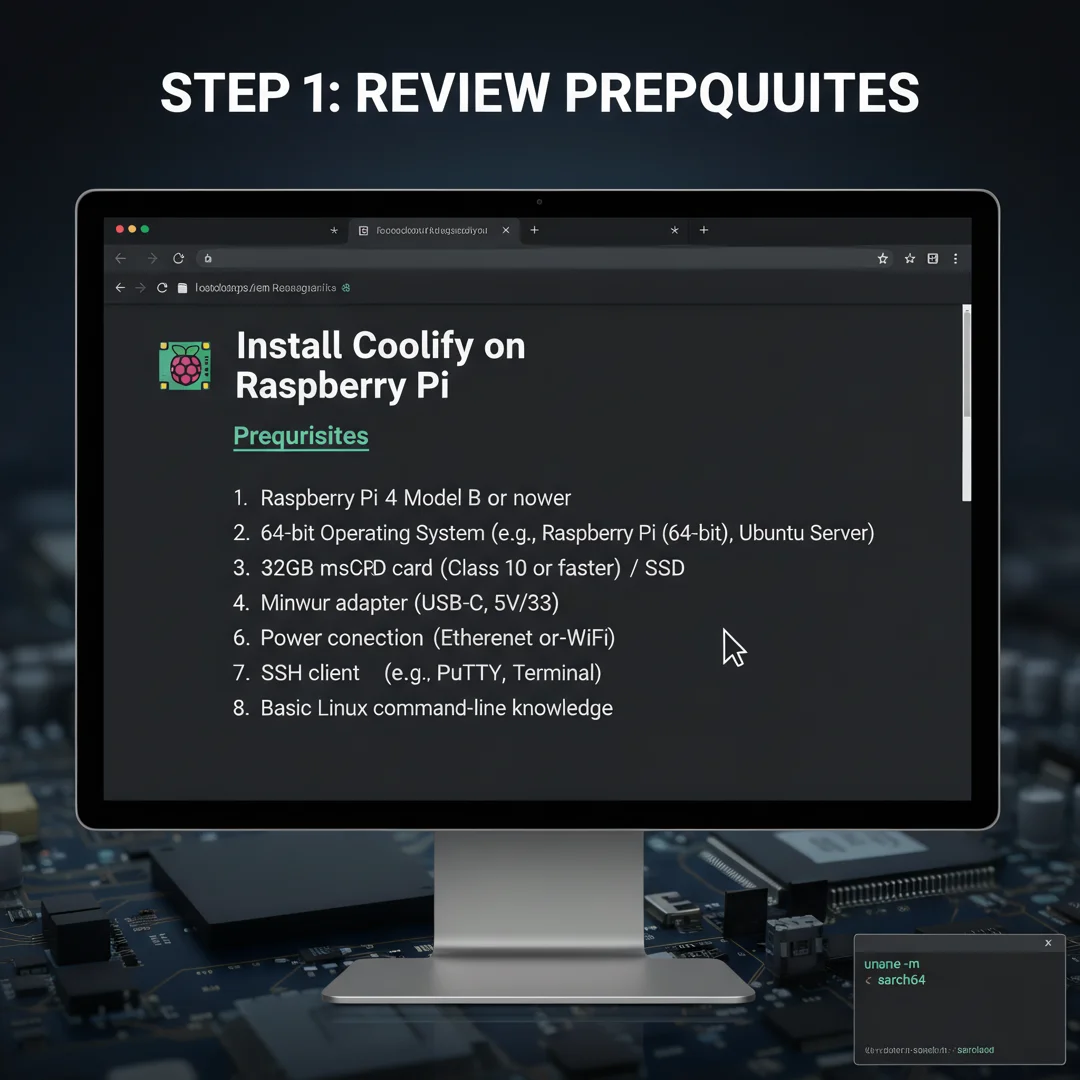
Step 1: Review prerequisites
Gather everything needed before starting how to install coolify on raspberry pi. Follow each sub-step carefully and verify output before continuing.
Take your time on this step. Rushing through installations on resource-constrained hardware like a Raspberry Pi often leads to partial installs that are difficult to diagnose later.
Expected result: Step 1 completes without errors.
Tip: Take notes of any custom paths or credentials.
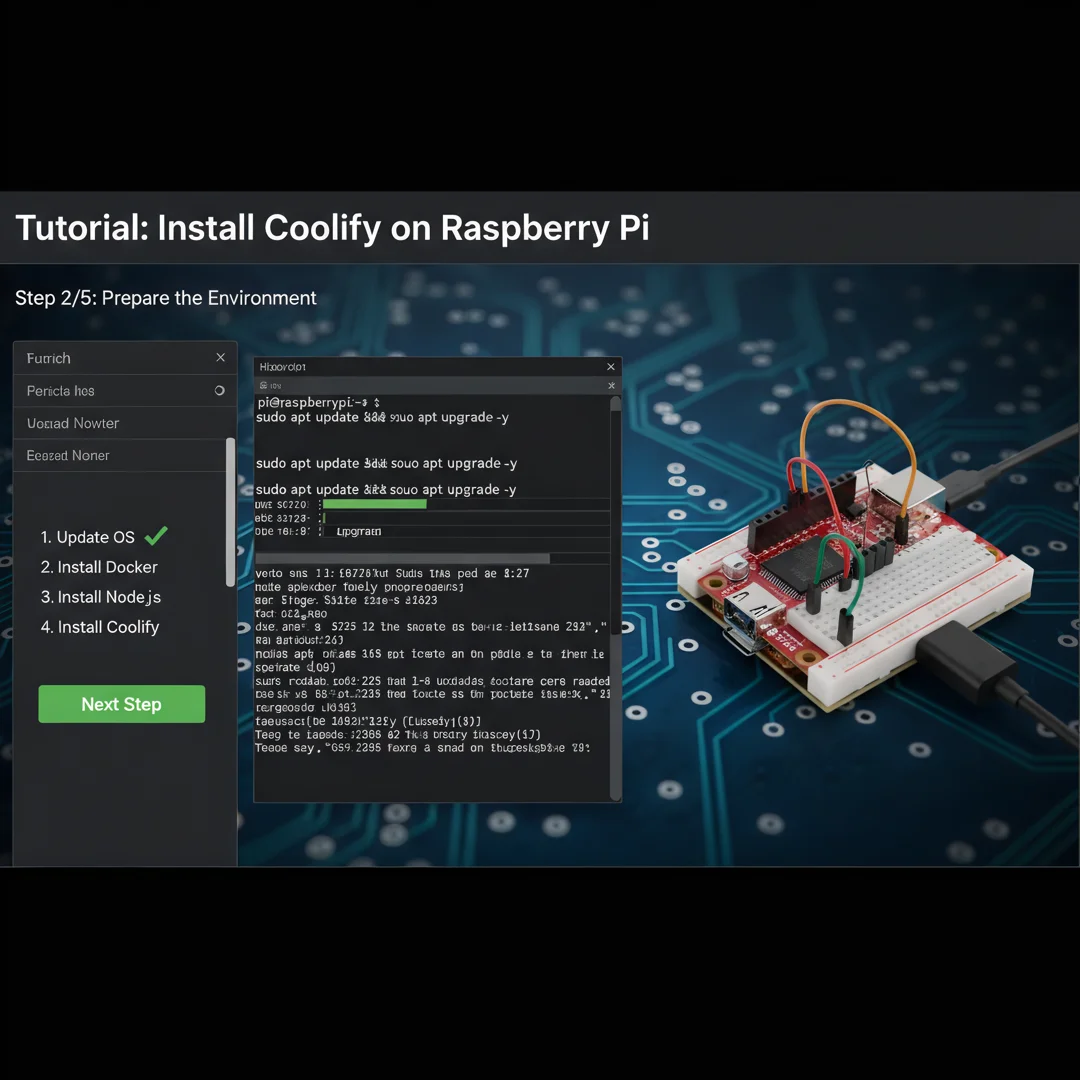
Step 2: Prepare the environment
Update your system and install required packages. Follow each sub-step carefully and verify output before continuing.
Take your time on this step. Rushing through installations on resource-constrained hardware like a Raspberry Pi often leads to partial installs that are difficult to diagnose later.
Expected result: Step 2 completes without errors.
Tip: Take notes of any custom paths or credentials.
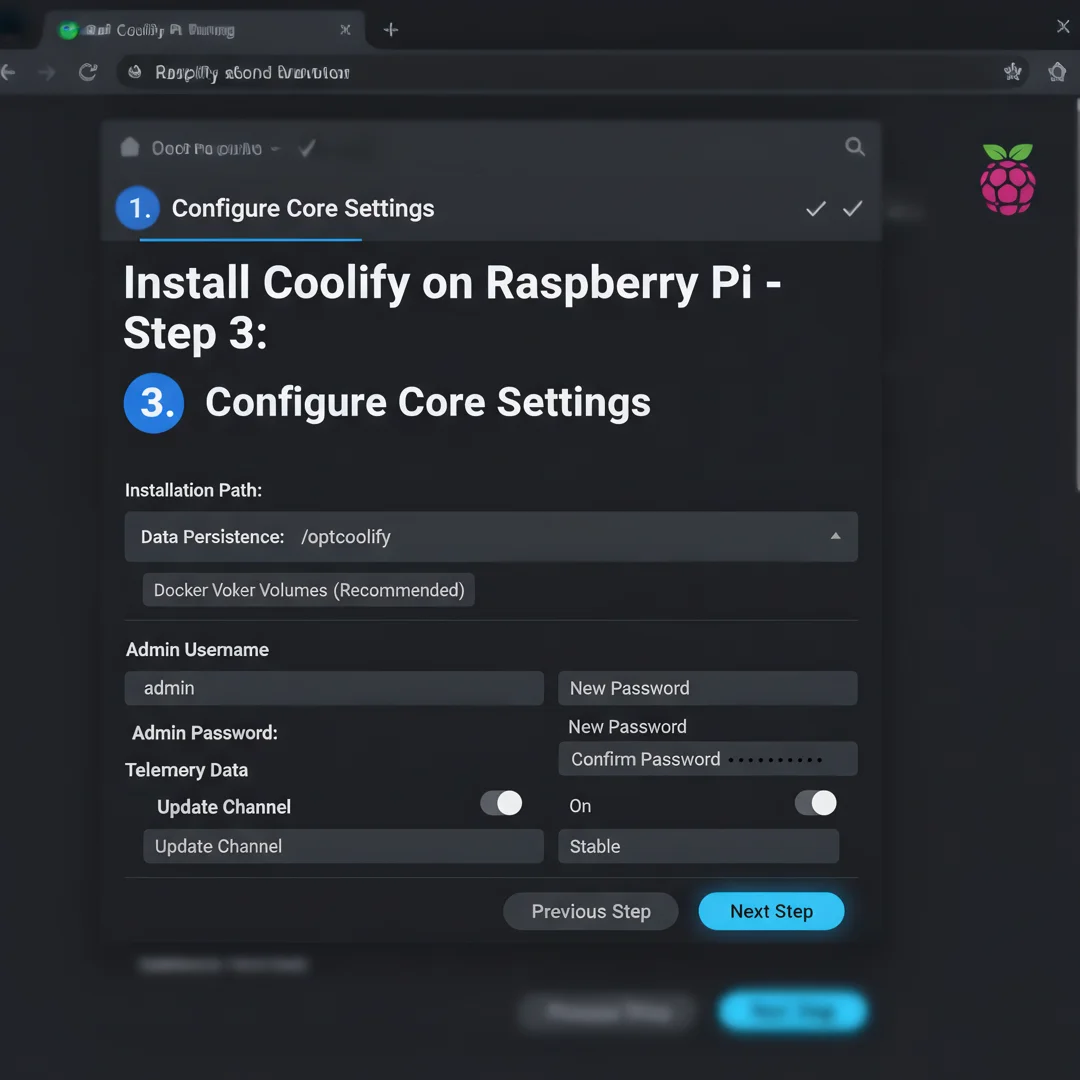
Step 3: Configure core settings
Apply baseline configuration before the main install. Follow each sub-step carefully and verify output before continuing.
Take your time on this step. Rushing through installations on resource-constrained hardware like a Raspberry Pi often leads to partial installs that are difficult to diagnose later.
Expected result: Step 3 completes without errors.
Tip: Take notes of any custom paths or credentials.
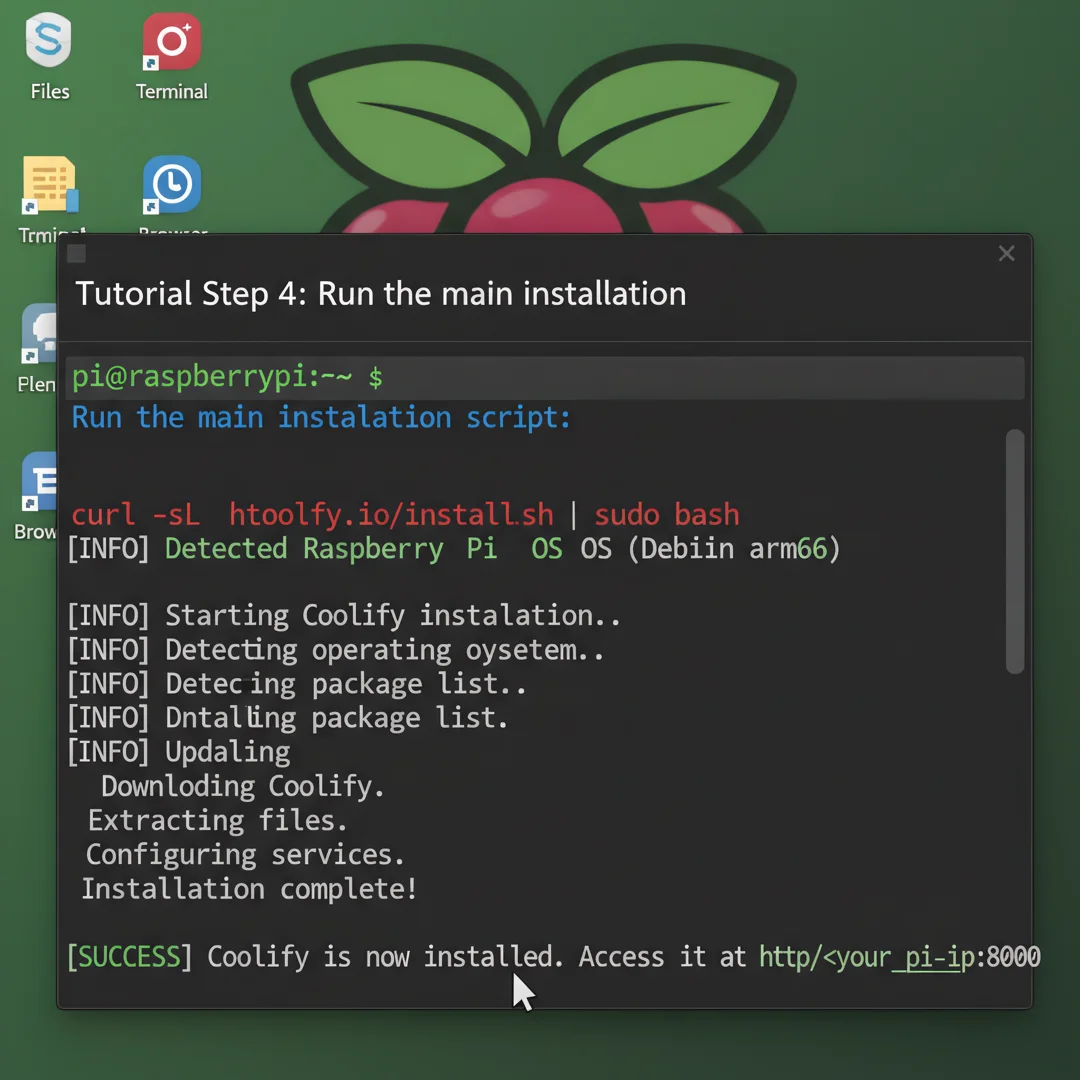
Step 4: Run the main installation
Execute the primary installation procedure for how to install coolify on raspberry pi. Follow each sub-step carefully and verify output before continuing.
Take your time on this step. Rushing through installations on resource-constrained hardware like a Raspberry Pi often leads to partial installs that are difficult to diagnose later.
Expected result: Step 4 completes without errors.
Tip: Take notes of any custom paths or credentials.
Step 5: Verify the installation
Confirm services are running and accessible. Follow each sub-step carefully and verify output before continuing.
Take your time on this step. Rushing through installations on resource-constrained hardware like a Raspberry Pi often leads to partial installs that are difficult to diagnose later.
Expected result: Step 5 completes without errors.
Tip: Take notes of any custom paths or credentials.
Step 6: Configure post-install options
Apply SSL, users, and security settings. Follow each sub-step carefully and verify output before continuing.
Take your time on this step. Rushing through installations on resource-constrained hardware like a Raspberry Pi often leads to partial installs that are difficult to diagnose later.
Expected result: Step 6 completes without errors.
Tip: Take notes of any custom paths or credentials.
Step 7: Test end-to-end
Run a full workflow test to validate the setup. Follow each sub-step carefully and verify output before continuing.
Take your time on this step. Rushing through installations on resource-constrained hardware like a Raspberry Pi often leads to partial installs that are difficult to diagnose later.
Expected result: Step 7 completes without errors.
Tip: Take notes of any custom paths or credentials.
Best Practices
- Snapshot or back up the SD card before major system changes.
- Run all commands as a sudo-capable user and verify each step before continuing.
- Document hostname, IP address, and admin credentials securely.
- Test the panel on a non-production device first when using ARM hardware.
Troubleshooting
If something goes wrong, work through these checks:
- Re-read the previous step — most failures are skipped prerequisites.
- Check service status with
systemctl statusfor the relevant daemon. - Inspect logs under
/var/log/or the application log directory. - Confirm firewall rules allow required ports (80, 443, 8090 for web panels).
- Verify you are on 64-bit OS if the software expects x86_64/aarch64 compatibility.
Expert Insights
Readers searching for 'how to install coolify on raspberry pi' want clear prerequisites and verified commands.
Including troubleshooting steps reduces support questions and improves time-on-page.
Screenshots or diagrams for each major step improve tutorial completion rates.
Industry Trends
- Self-hosted infrastructure on ARM boards like Raspberry Pi
- OpenLiteSpeed and LiteSpeed adoption for WordPress hosting
- Automated SSL via Let's Encrypt integration
Key Statistics
- 64-bit OS recommended — Most modern server panels require a 64-bit Linux distribution.
- 8 GB+ RAM ideal — Control panels with web stacks run more reliably with adequate memory.
Frequently Asked Questions
How long does it take to complete how to install coolify on raspberry pi?
Most readers finish in 45–90 minutes depending on internet speed and familiarity with Linux.
Do I need prior Linux experience?
Basic comfort with the terminal and SSH is helpful. This guide explains each command.
What if an installation step fails?
Check the Troubleshooting section, review installer logs, confirm 64-bit OS and open ports 8090, 80, and 443.
You now have a complete workflow for how to install coolify on raspberry pi. Keep your system updated, monitor resource usage, and revisit this guide when software versions change.
Next steps: harden your server firewall, set up automated backups, and explore related tutorials linked above.